When an employee needs some extra breaks except to allowed in a time slot then the employer can create break types. Employees can use them in my timesheet edit.
To know more about how to create and use break types. Follow the following steps.
- In the navbar click the attendance tab.
- The above step will open new tabs in the dropdown. Click the settings tab.

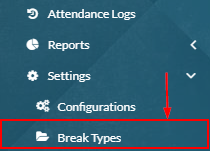
- The above step will open new tabs in the dropdown. Click the break types tab.
- The above step will open the break types index page.
- Click create button to create break type.

- The above step will open a pop to create a break type.
- Enter the name of break type.
- Enter the name of the start identifier.
- Enter the name of the end identifier.

- Click the save button to save break type.

- Break type will be created.
- Employers can edit, view and delete.

- Employees can use this break whenever they need it.
- To use this employees need to open my timesheet.
- Follow the first three-step of What is my timesheet? to open my timesheet.
- Click the edit button present in actions
- The above step will open a popup to edit my timesheet.
- Click add button present in the break section.

- The above step will add a row in the break section.
- Select break type from the dropdown.
- Click on the calendar to select break start and end date.
- Add break start and end time.
- Click the delete button to delete a row.

- Click the save button in the timesheet to add break type.