Employers can create different branches of a company.
To know more about how to create a branch. Follow these following steps.
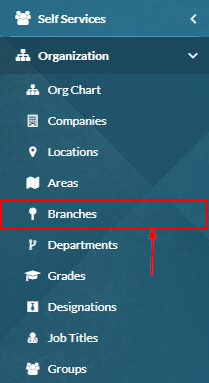
- In the navbar click the organization tab.
- The above step will open new tabs in the dropdown. Click the branches tab.
- The above step will open the branches listing page.
- Click create button to create a branch.

- The above step will open a popup to create a branch.
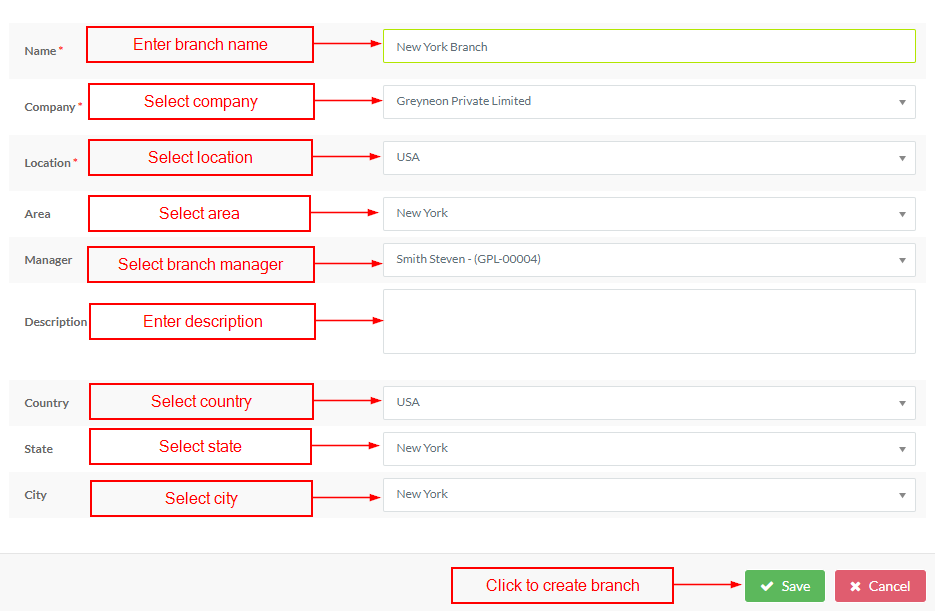
- Enter branch name.
- Select the company from the drop-down for which you want to create a branch if you have multiple companies. Company is already explained in How to create company?.
- Select location from drop-down where the branch is located. Location is already explained in How to create location?.
- Select the area from the drop-down where the branch is located. The area is already explained in How to create area?.
- Select branch manager from the dropdown.
- Enter branch description.
- Select country from drop-down where the branch is located.
- Select State from drop down where the branch is located.
- Select city from drop-down where the branch is located.
- Click the save button to create a branch.
- Branch will be created and look like.

- Click the edit button to edit the branch.

- Click on the edit button will open a popup to the edit branch. Edit process is the same as like create process. Repeat step 5-15 from the above section of the document to edit the branch.
- Employers can't edit company and location in the branch.
- Click the View button to view the branch.

- Click on the View button will open a popup to view the branch. Employees can't change anything.
- Click the Cancel button to close the popup.
- Click the delete button to delete the branch.

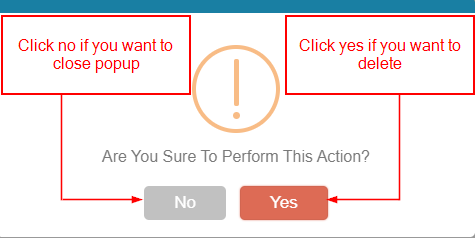
- Click on the delete button will open a confirmation popup to delete the branch.
- Click yes if you want to delete.
- Click no if you don't want to delete.
- Employers can delete only those branches which are not used yet.