An employer can manage a checklist to create the end of employment of any employee. The checklist is basically a list of certain steps which employee need to perform like handover resources, signature on documents etc.
To know more about how to manage a checklist. Follow the following steps.
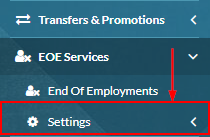
- In the navbar click eoe services tab.
- The above step will open new tabs in the dropdown. Click the settings tab.
- The above step will open new tabs in the dropdown. Click the checklist tab.

- The above step will open the checklist listing page.
- Click create button to create a checklist for you.

- The above step will open a popup to create a checklist for you.
- Field with red sterics is necessary to fill.
- Enter checklist name.
- Select checklist status.
- Enter checklist description.

- Click create button to add additional information.

- The above step will open a popup to add additional information.
- Enter additional information name.
- Select additional information type from the dropdown.
- If the employer selected type as a number system will show two fields to enter a minimum and maximum values.
- If the employer selected type as string system will show two fields to enter a minimum and maximum lengths.
- Click the required checkbox if this additional information is necessary.
- Click the save button to create additional information.

- Additional information will be created and look like.

- An employer can edit, view and delete it.
- Click the save button to create a checklist for you.

- A checklist for eoe will be created and look like.

- Click the edit button to edit eoe checklist.

- Click on the edit button will open a popup to edit eoe checklist. Edit process is the same as like create process.
- Click view button to view eoe checklist.

- Click on the view button will open a popup to view the EOE checklist. Employees can't change anything.
- Click the Cancel button to close the popup.