Required Apps Download Link
1- Install the latest .NET Framework Runtime from https://dotnet.microsoft.com/en-us/download/dotnet-framework/net48
2- Download and install SQL Server (Developer) from https://www.microsoft.com/en-us/sql-server/sql-server-downloads
3- Download and install SQL Server Management Studio (SSMS) from https://learn.microsoft.com/en-us/sql/ssms/download-sql-server-management-studio-ssms?view=sql-server-ver16
4- Download ZKTeco SDK from https://drive.google.com/drive/folders/18_VQUFV_nuG0P0D1t7DYEPlSrB2hUmyK?usp=sharing
5- Install ZKTeco SDK and Run as administrator RegisterSDK.bat file
6- Download Resourceinn Attendance Client Setup from https://drive.google.com/file/d/10LgPCAp_2YlcprQ18B7cwq9dNhv7R_Tl/view?usp=sharing
Installation
1- Right click on setup and click on Install
_1668492567.png)
2- Click on the Run button
_1668492639.png)
3- Clock on browse button and select path C:\Users[logged in user]\ create a folder Resourceinn here and click next to install app in this folder
_1668492694.png)
_1668492743.png)
4- Installation completed.
_1668492794.png)
Configuration
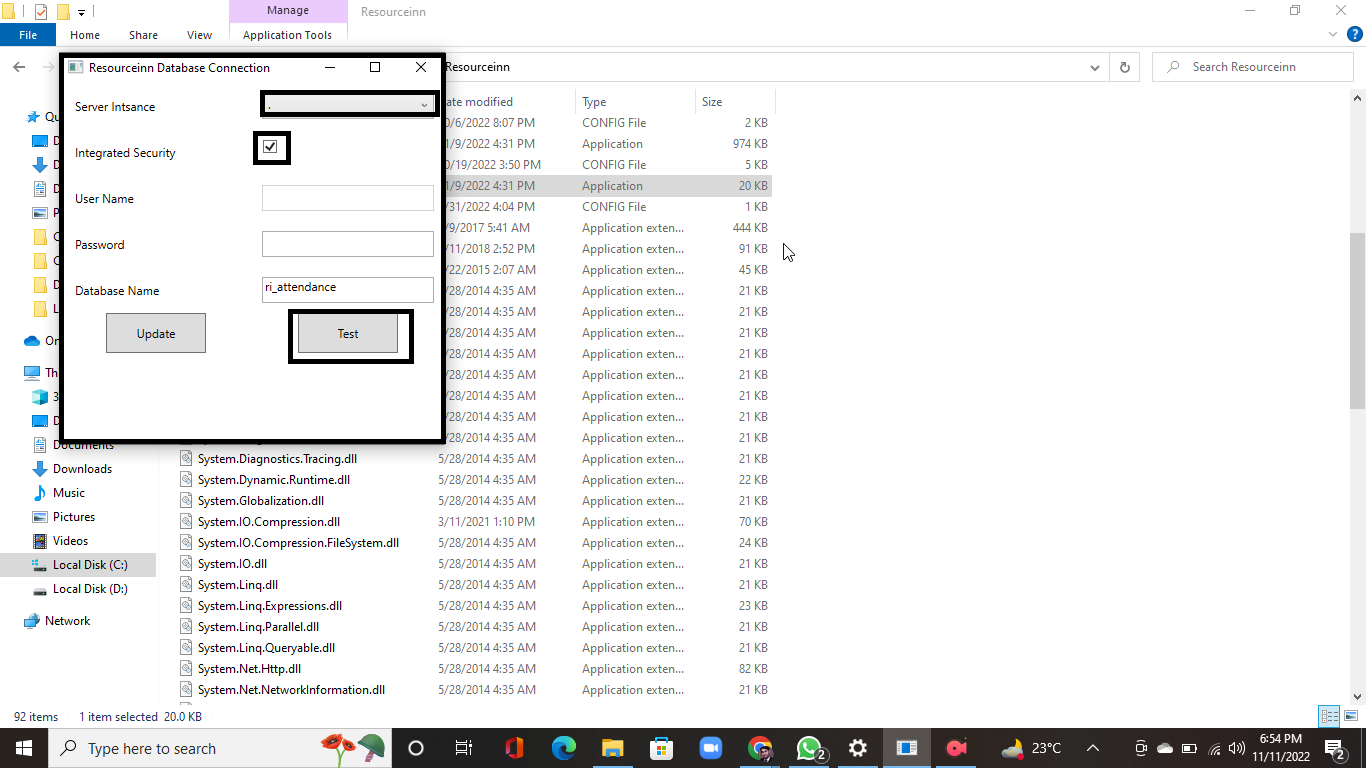
1- Go to this path C:\Users\Resourceinn\Resourceinn and Run as administrator the exe file Resourceinn Attendance Database connection
_1668492841.png)
2- Select Server Instance from the dropdown, mark checked true the integrated security check box and then click on Test button if test successful click on Update button
3- Go to the desktop you will find the Resourceinn app open it
4- Write the subdomain name and click the Next button
_1668492955.png)
5- Select the company from the dropdown and click on the Next button
_1668492994.png)
6- Select the location from the dropdown and click on the Next button
_1668493036.png)
7- Select the branch from the dropdown and click on the Next button
_1668493087.png)
8- Reader Box > Mark check box True if using digital persona OR remain to uncheck if using attendance machine
_1668493122.png)
9- Write your Username (admin), password (123456) and click on the login button
_1668493155.png)
10- First click on setting then click on Machine from the dropdown
_1668493232.png)
11- Click on the Sync Machines button
_1668493271.png)
12- Click Ok
_1668493307.png)
13- Click on the action button for the connection and then click on Ok
_1668493353.png)
14- Click on configuration and then click on AutoSync's edit button
_1668493386.png)
15- Make sure to set value 1 and then click on the Update button
_1668493423.png)
16- Click on Employee > All Employee and then click on the Refresh button
_1668493454.png)
17- All employees' data are shown here, you can upload data to Resourceinn by clicking on the Upload button OR when you close the app and open it again data automatically uploads to Resourceinn
_1668493492.png)