In the company, the employee's system will show all employees. An employer can create new employee, edit and view details of existing employees. An employer can download and import template to create employee. The employer can also download profile cards.
To know more about how to manage company employee. Follow the following steps.
- In the navbar click the employee tab.
- The above step will open new tabs in the dropdown. Click the company employee tab.
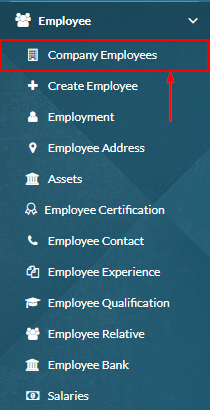
- The above step will open the company employee listing page.
- An employee can create a new employee. To create a new employee click create button.

- The above step will take us to create an employee page. Create employee is already explained in How to manage employee?.
- An employee can create a new employee through import. To create a new employee through import click the download template button to download the template.

- The above step will download the excel file in the download folder. Add data in this file.
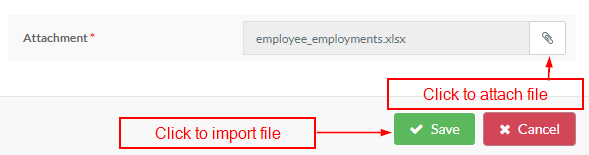
- After adding data employer need to import the file. Click the Import button to import the template.

- Click on the import button will open a popup to import the template.
- Click attach file button to attach the file.
- Click the save button to import the file.
- An employer can download an employee card.
- To download the employee card click the download card button.

- Click on download card will download a pdf file in the Downloads folder. This file will contain an employee profile card.
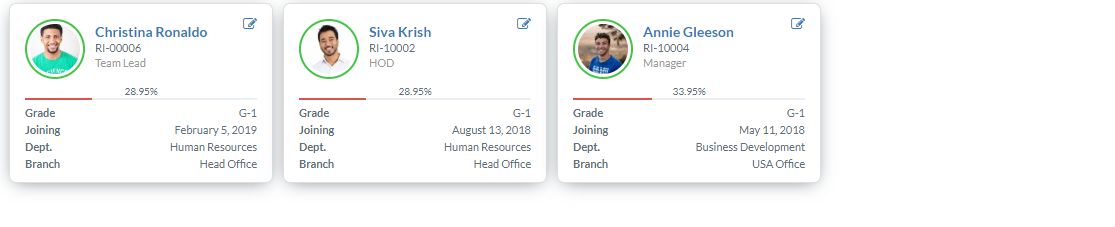
- In a company, the employee's system will show employee data.
- Click the edit button to edit data.
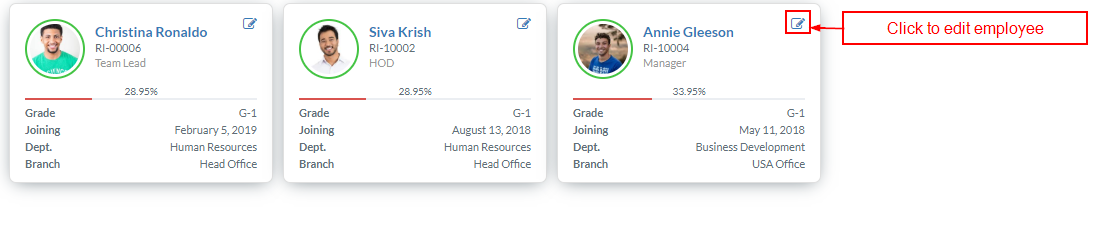
- Click on the edit button will open the data of a single employee and it will look like.
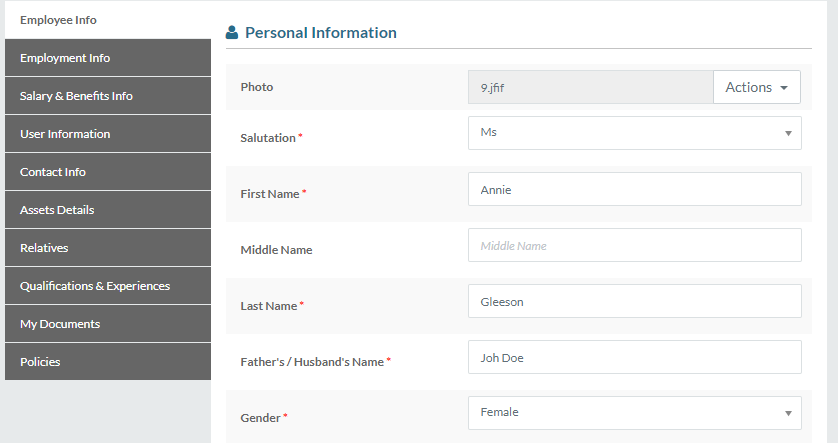
- Employers can edit employee info, employment info, salary and user information but can create, edit, delete contact, assets, relatives and qualifications sections.
- To edit employee, info clicks the employee info button.
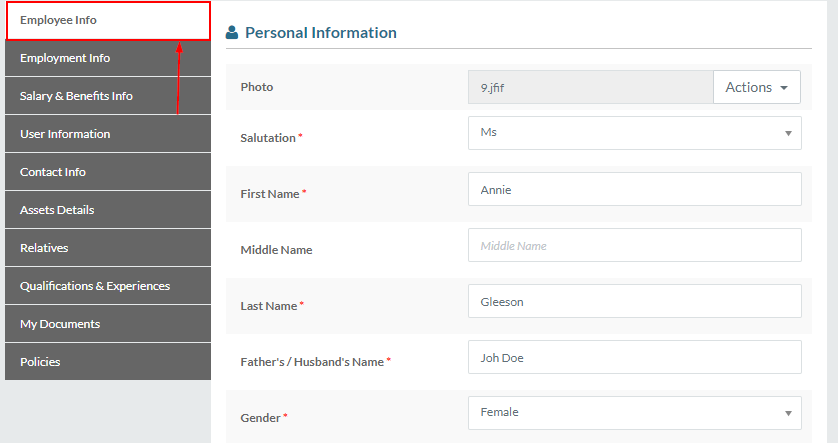
- Employee info is already explained in How to manage employee?. Follow step 5-35 to edit employee info.
- To edit employment, info clicks the employment info button.
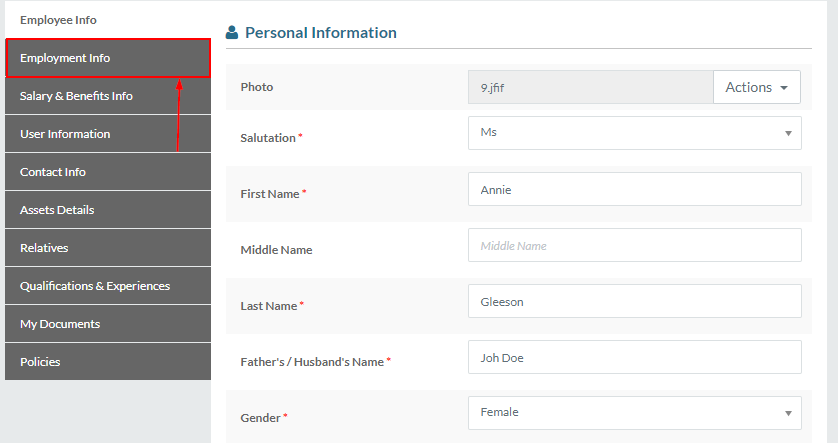
- Employment info is already explained in How to manage employment?. Follow step 7-35 to edit employment info.
- The employer can't change employee company in employment info.
- To edit salary & benefits info click the salary & benefits info button.
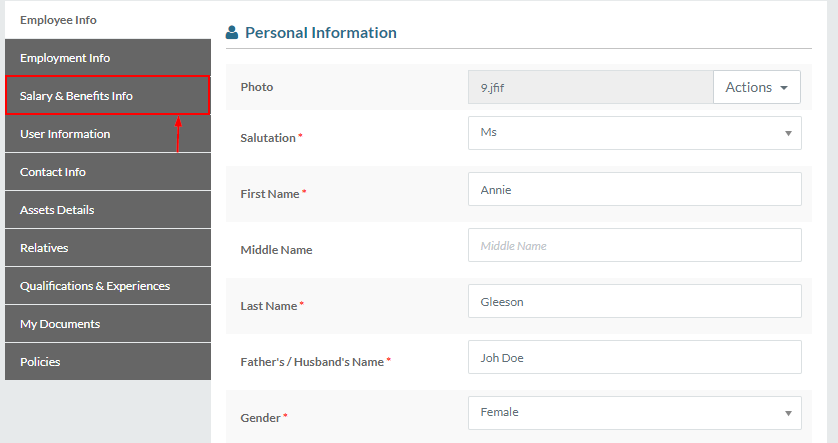
- Salary & benefits are already explained in How to manage employee salary?. Follow step 8-16 to edit salary & benefits.
- To edit user information click the user information button.
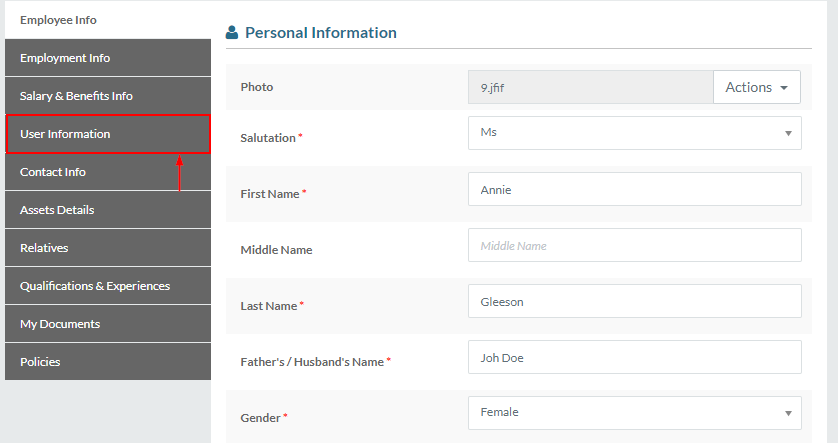
- User information is already explained in How to manage employee?. Follow step 38-44 to edit user information.
- To create, edit and delete employee contact and address click the contact info button.
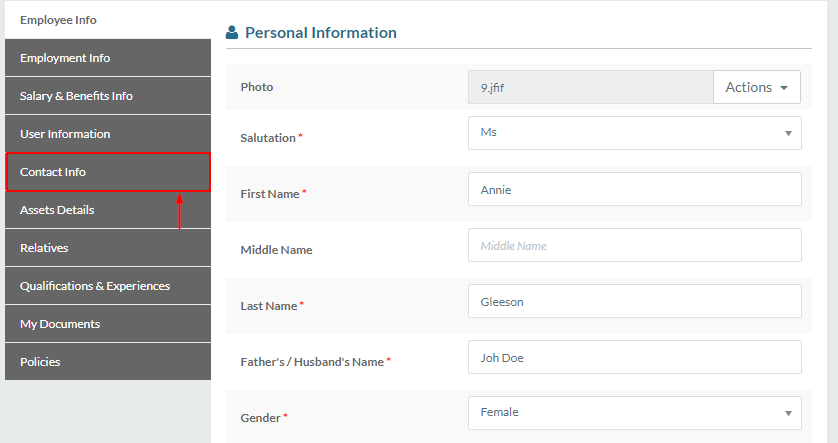
- Click on contact info will open the contact and address section.
- Contact is already explained in How to manage employee contacts?. Except to step 8 follow step 5-25 to create, edit and delete the contact.
- The address is already explained in How to manage employee address?. Except to step 6 follow step 5-23 to create, edit and delete the address.
- To allocate, deallocate and view allocated assets click the assets detail button.
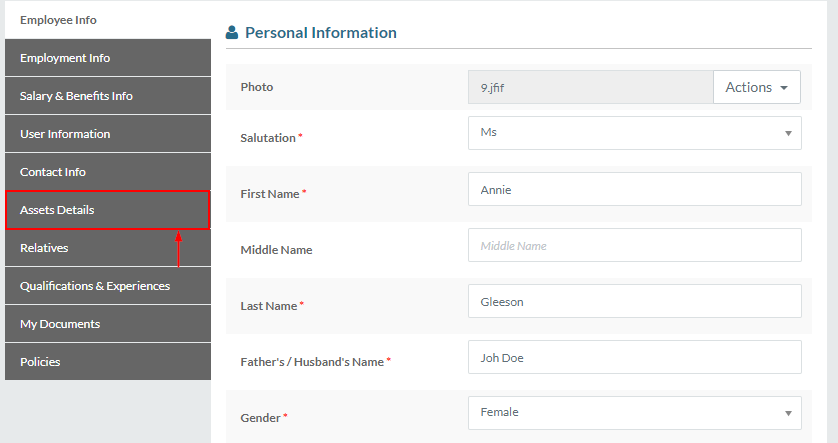
- The asset is already explained in How to allocate assets?. Except to step 6 follow step 5-21 to allocate, deallocate and view allocated assets.
- To create, edit and delete relatives click the relatives button.

- Relatives are already explained in How to manage employee relative?. Except to step 7 follow step 5-30 to create, edit and delete relatives.
- To create, edit and delete qualification, experience and certifications click the qualification and experience button.
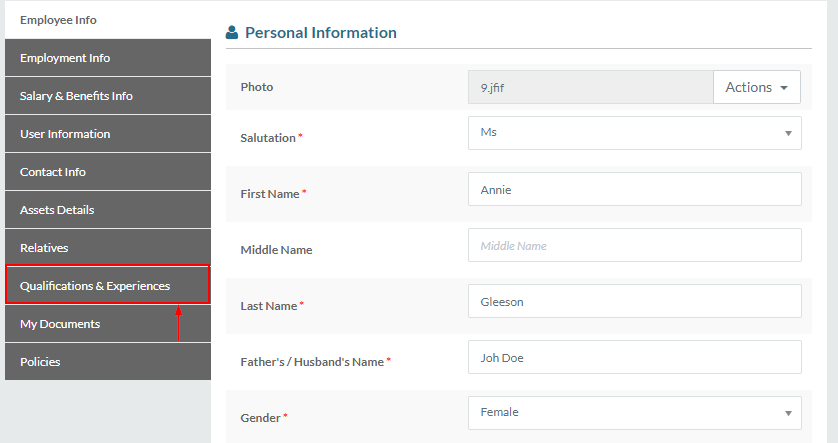
- Click on the qualification and experience button will open experience, qualification and certifications data.
- Experience is already explained in How to manage employee experience?. Except to step 7 follow step 5-35 to create, edit and delete experience.
- Qualification is already explained in How to manage employee qualification?. Except to step 7 follow step 5-27 to create, edit and delete qualification.
- Certifications are already explained in How to manage employee certification?. Except to step 7 follow step 5-24 to create, edit and delete certifications.
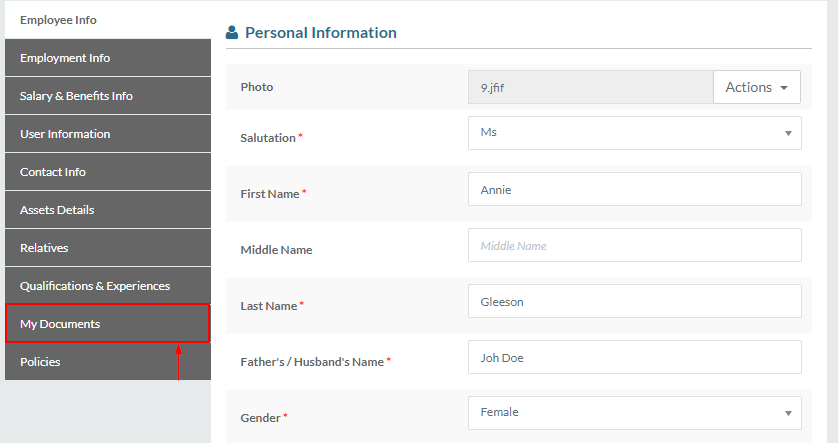
- To attach documents other than qualification, experience, click my documents button.
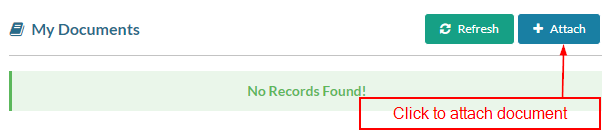
- Click on the my documents button will open documents.
- Click attach button if you want to attach a document.
- Click on attach button will open a popup to attach the document.
- Enter document name.
- Select the document type. Document type is already explained in How to manage document type?
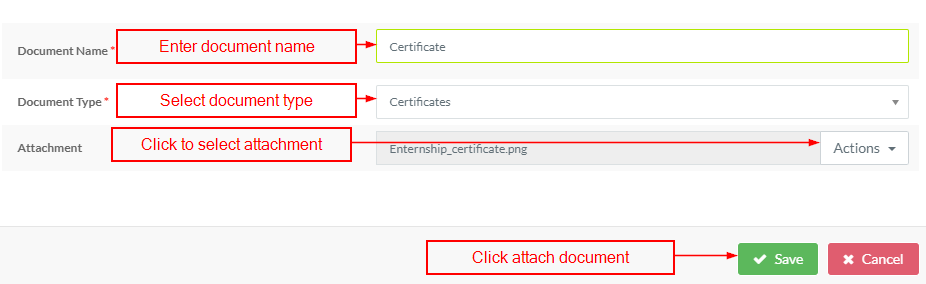
- Click the save button to attach the document.
- Whenever a new employee is created in the policy section employer can plan default shifts. An employer can also add attendance policies saw leave types assigned to him.
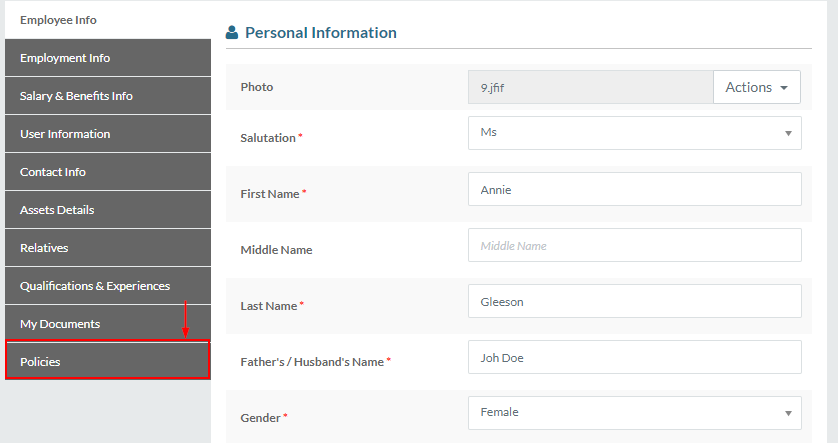
- To add policies click the policies button.
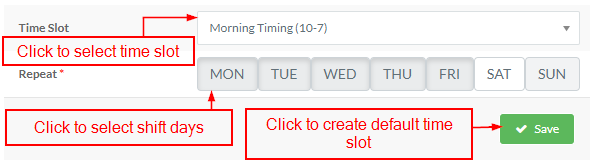
- In policies, section employer can plan a default shift. The system will consider this shift the same as the roster shift. An employer can add this shift for seven days. But when a day is passed system will repeat it for the next seven days.
- Select a time slot to add a default time slot.
- Click on days to plan shift for days.
- Click the save button to create the default time slot.
- After clicking the save button default shift will be created. Follow step 26 in how to create a roster? to view the roster.
- When a new shift is planned on the roster system will consider roster shift.
- Employers can add view leave types assigned to an employee in the leave type section.
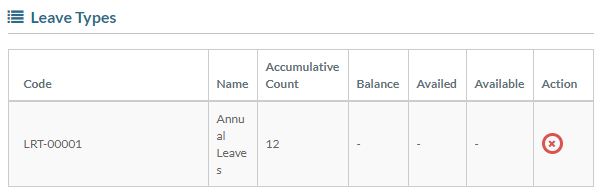
- Name shows leave type name.
- Accumulative count means assigned quota. Sometimes leave type is assigned but employee can't apply for leave due to leave type policies. The system shows the assigned quota in the accumulative count column.
- The balance column shows the total assigned leaves.
- The availed column shows the total availed leaves.
- The available column shows the total available leaves.
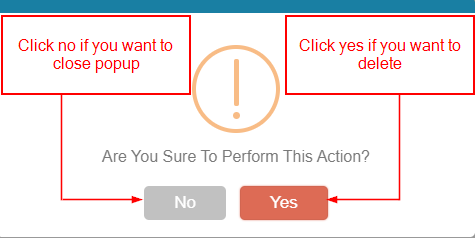
- Click the delete button if the employer wants to delete the assigned quota.
- Click on the delete button will open a confirmation popup to delete the assigned leave type.
- Click yes if you want to delete.
- Click no if you don't want to delete.
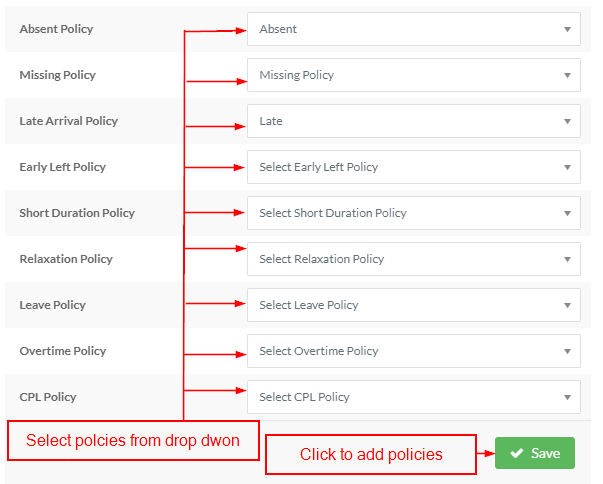
- In policies, section employer can also add attendance policies.
- To add attendance policies select available policies from the dropdown.
- Click the save button to add attendance policies.
- An employer can also view the details of any employee.
- To view details of employee click on employee name.

- Click on employee name will open a popup to view employee details.
- The employer can view details of employee info, employment info, salary, user information, contact, assets, relatives, qualification, documents and policies.